Getting started with your account
Your Election Admin Suite account is where your office signs in, adds its people, and sets up the things every suite tool shares: your name, logo and colors, your polling places, your elections and your contacts. Set it up once and every tool uses it.
1. Create your account
There's no password to make up. The suite emails you a link each time you sign in.
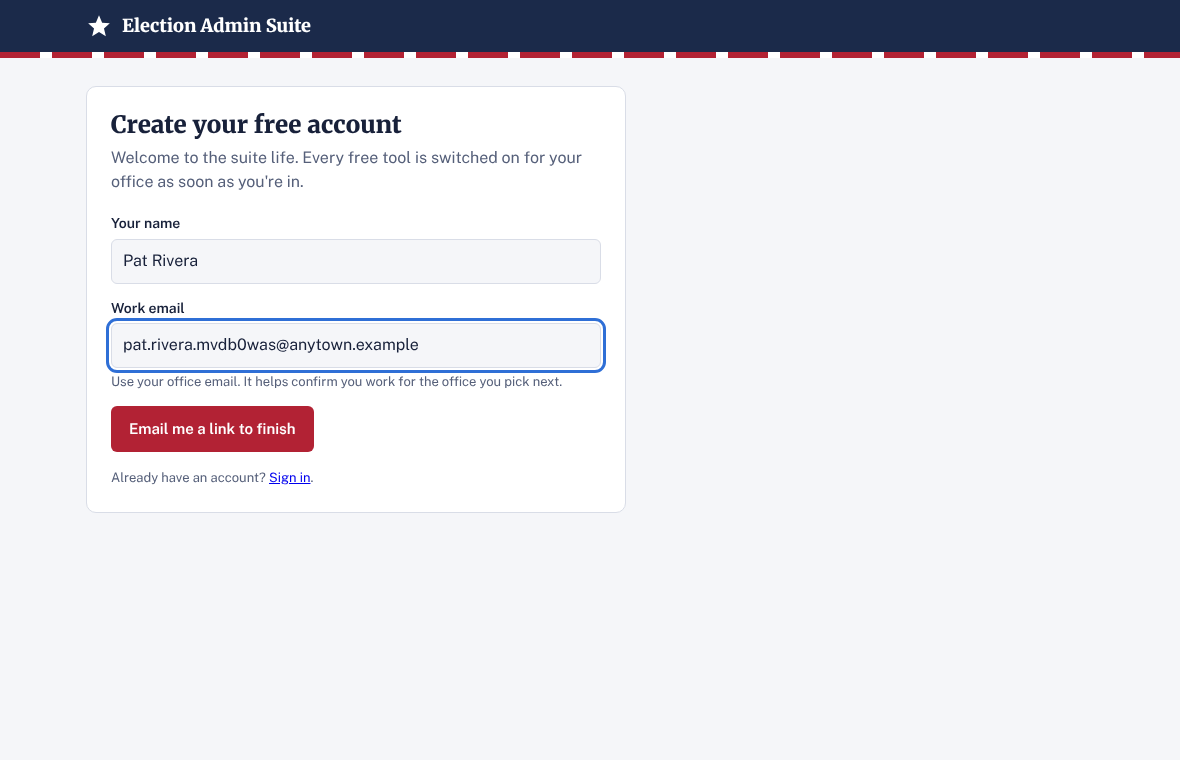
- Go to electionadminsuite.com and click Create a free account.
- Type your name and your work email. Use your office email address (for example, the one ending in your town's web address). It helps show that you really work for your office.
- Click Email me a link to finish.
- Open the email from Election Admin Suite and click the link in it. The link works once, for 15 minutes. If it has expired, start again from step 1.
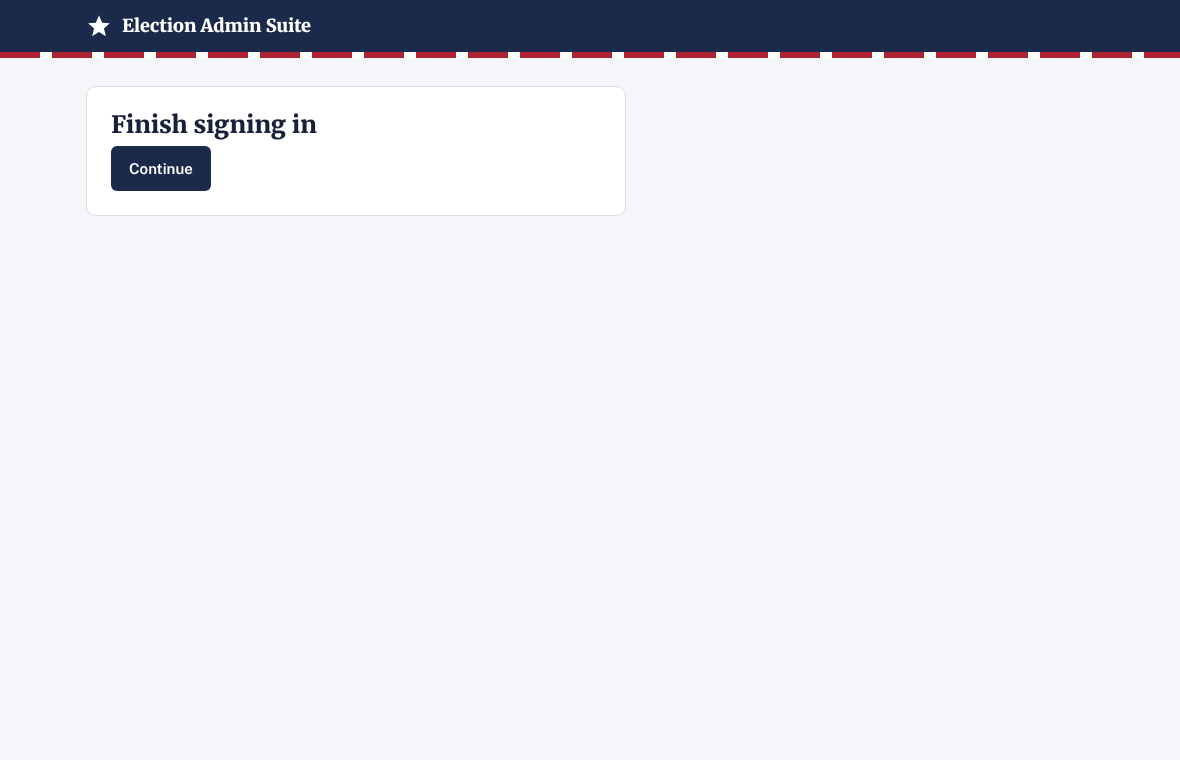
- The link opens a page that says Finish signing in. Click Continue.
No email after a few minutes? Check your junk or spam folder. The email comes from suite@electionadminsuite.com.
2. Add your office
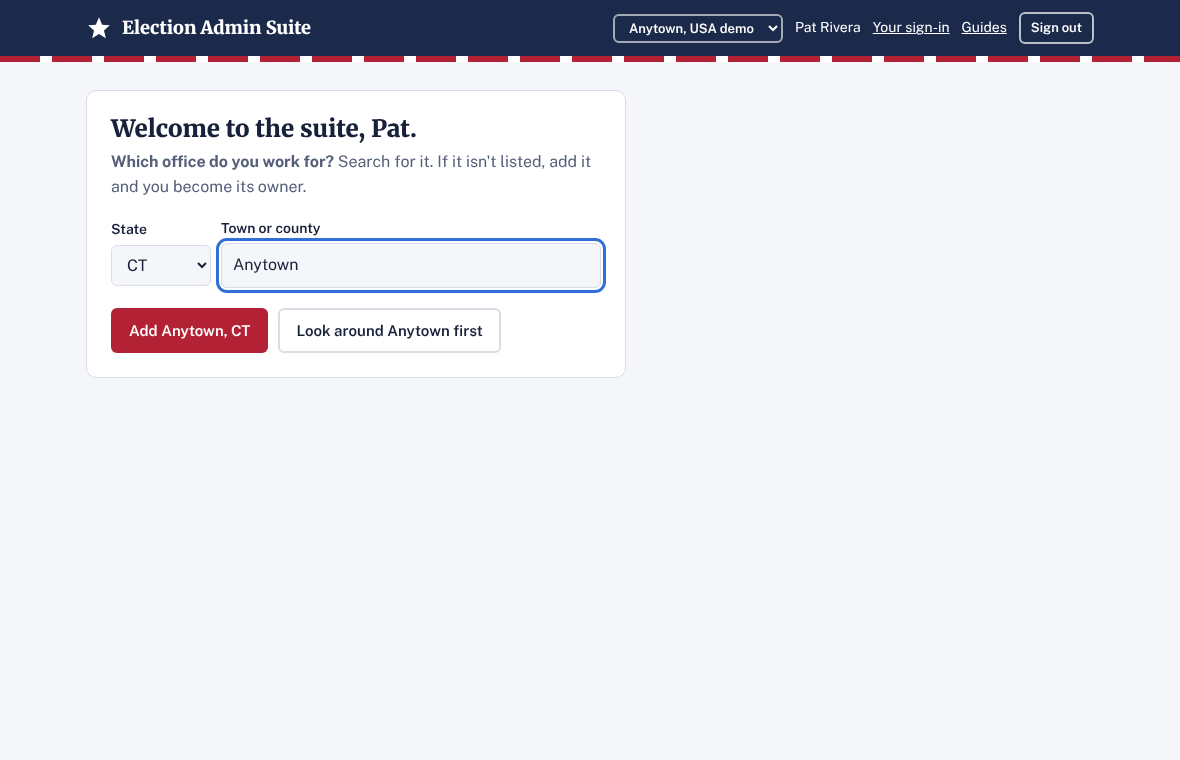
The first time you sign in, the suite says Welcome to the suite and asks which office you work for.
- Pick your state, then start typing your town or county.
- If your office is already on the suite, it appears under Already on the suite. Click Ask to join. Its owners and admins get an email and approve you. Stop here until they do.
- If it isn't listed, click Add <your town>, <state>.
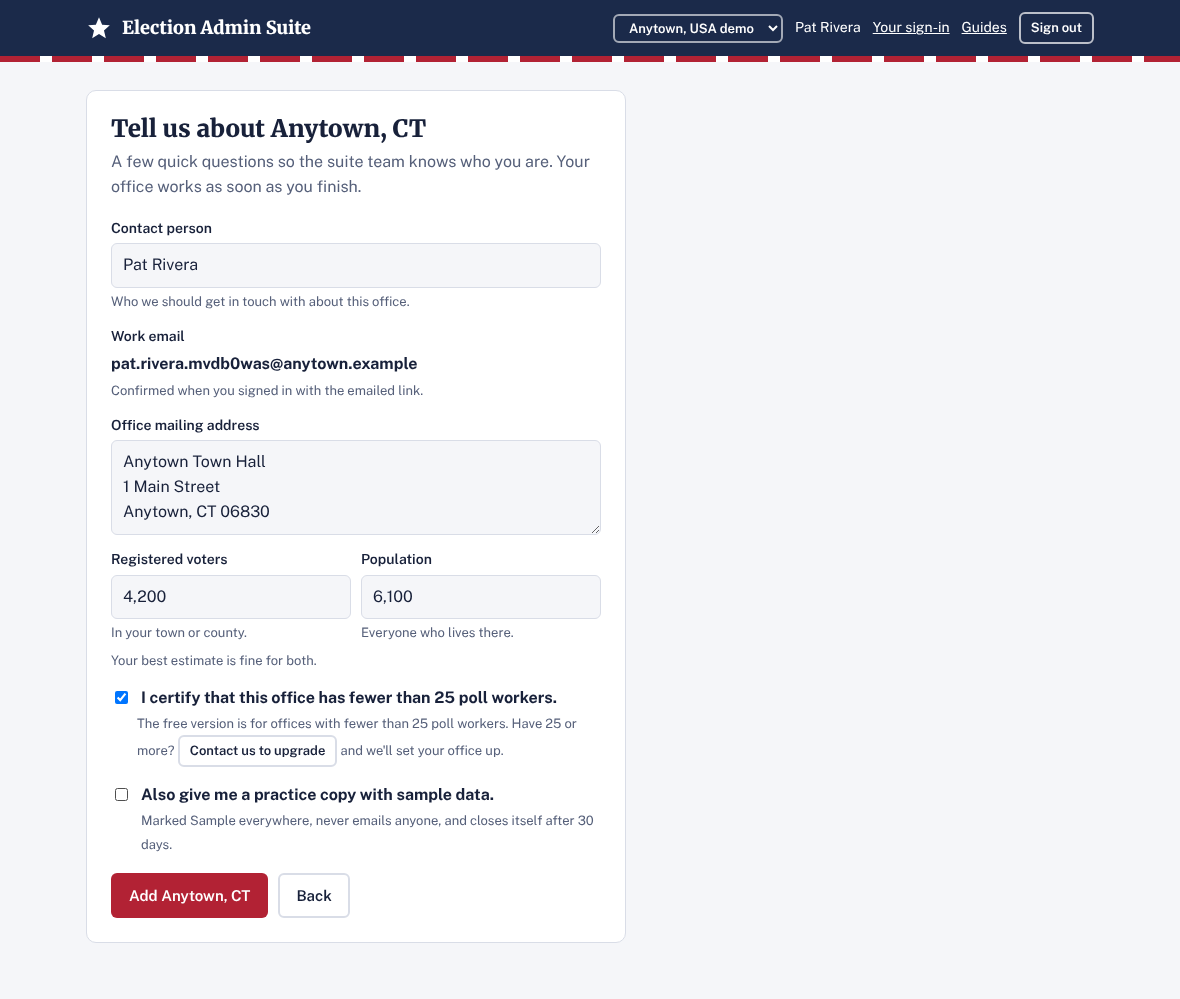
Next, the suite asks a few quick questions about the office, headed Tell us about <your town>. They help the suite team check that the office is really yours.
- Contact person is filled in with your name. Change it if someone else should be our contact.
- Work email is the address you signed in with. It's already confirmed by the sign-in link, so there's nothing to type.
- Type the office's mailing address, with the town, state and ZIP code.
- Type about how many registered voters your town or county has, and its population (everyone who lives there). Your best estimate is fine for both.
- Tick I certify that this office has fewer than 25 poll workers. The free version is for offices that size. If yours has 25 or more, click Contact us to upgrade instead and we'll set your office up.
- Leave Also give me a practice copy with sample data ticked if you'd like a sample office to try things in (see section 12).
- Click Add <your town>, <state>. You become the office's owner.
You land on your office's Tools page, headed Your suite, with every free tool switched on. We also email you a short welcome with three good first steps and a link back to this guide.
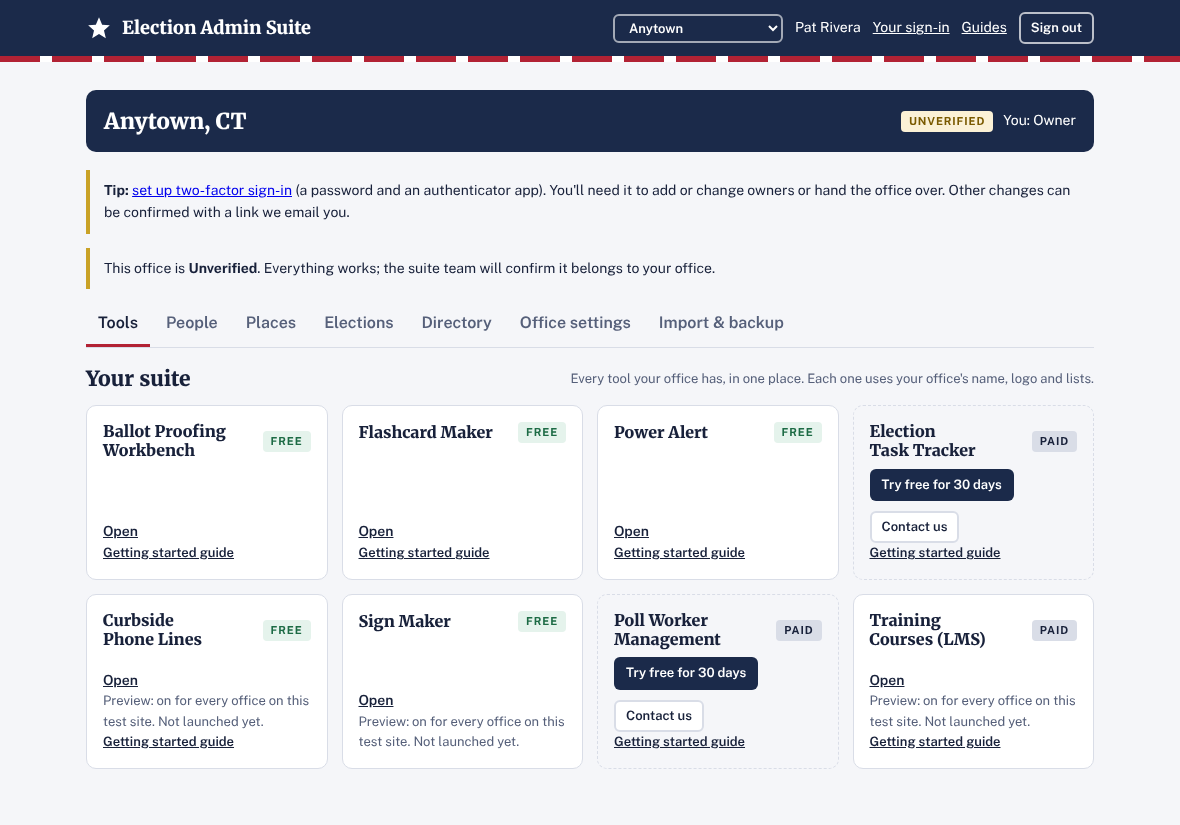
"Unverified" means the suite team hasn't yet confirmed the office is yours. Everything works while it's unverified. The team looks over what you told us about every new office, and emails the contact person if they have a question.
3. "Confirm it's you"
Before you change people or settings, the suite asks you to confirm it's really you. This stops anyone who gets hold of a computer you left signed in. You only do it once per sign-in.
- The first time you save a change, a box appears: Confirm it's you.
- Click Email me a confirmation link.
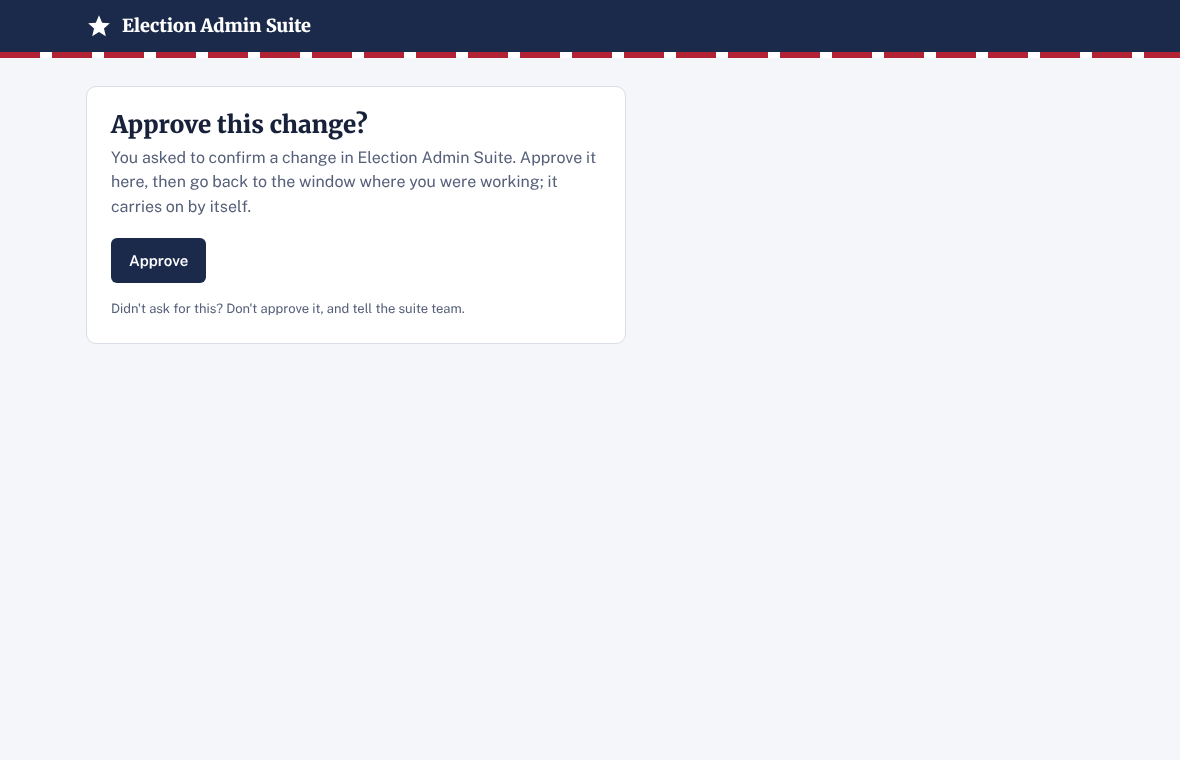
- Open that email, on your phone or computer, and click the link. A page asks Approve this change?. Click Approve.
- Go back to the window where you were working. Within a few seconds it carries on and saves your change by itself.
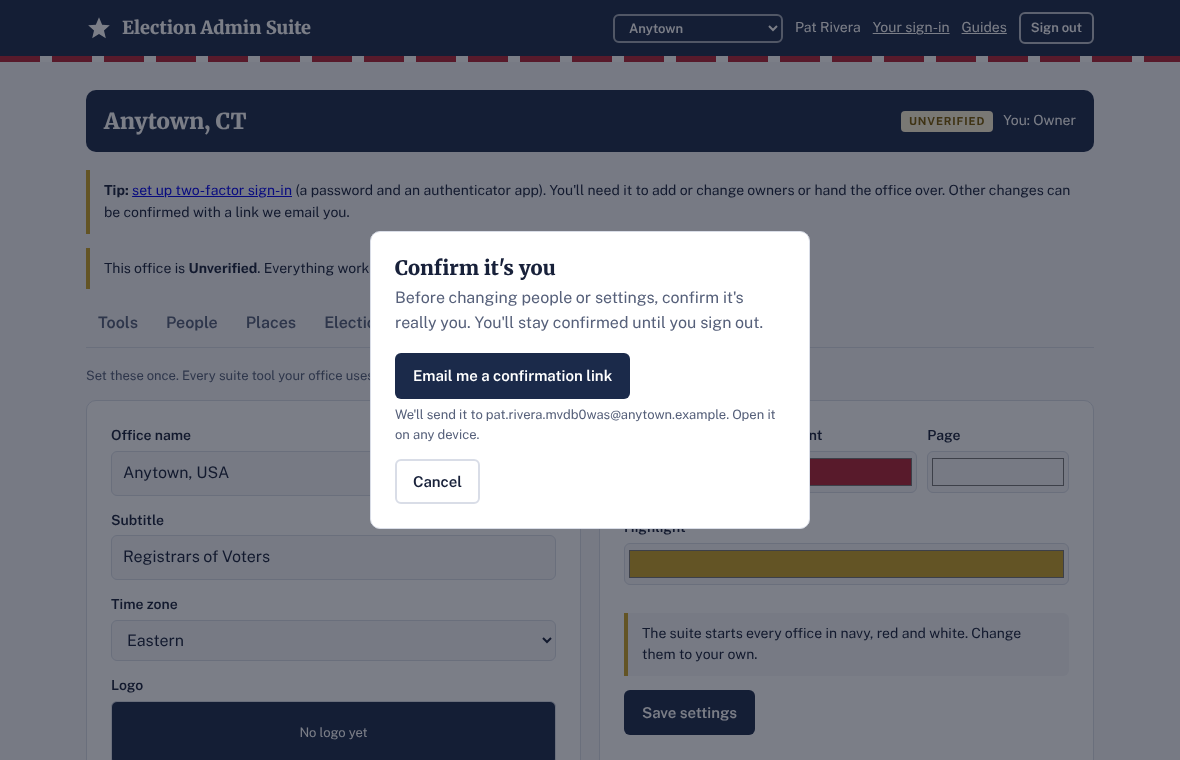
If you set up an authenticator app (section 10), the box also lets you type your password and the app's 6-digit code instead of waiting for an email. A few changes always need the app: adding or changing an owner and handing the office to someone else.
4. Your name, logo and colors
Every suite tool shows your office's name, logo and colors, so you set them once, here.
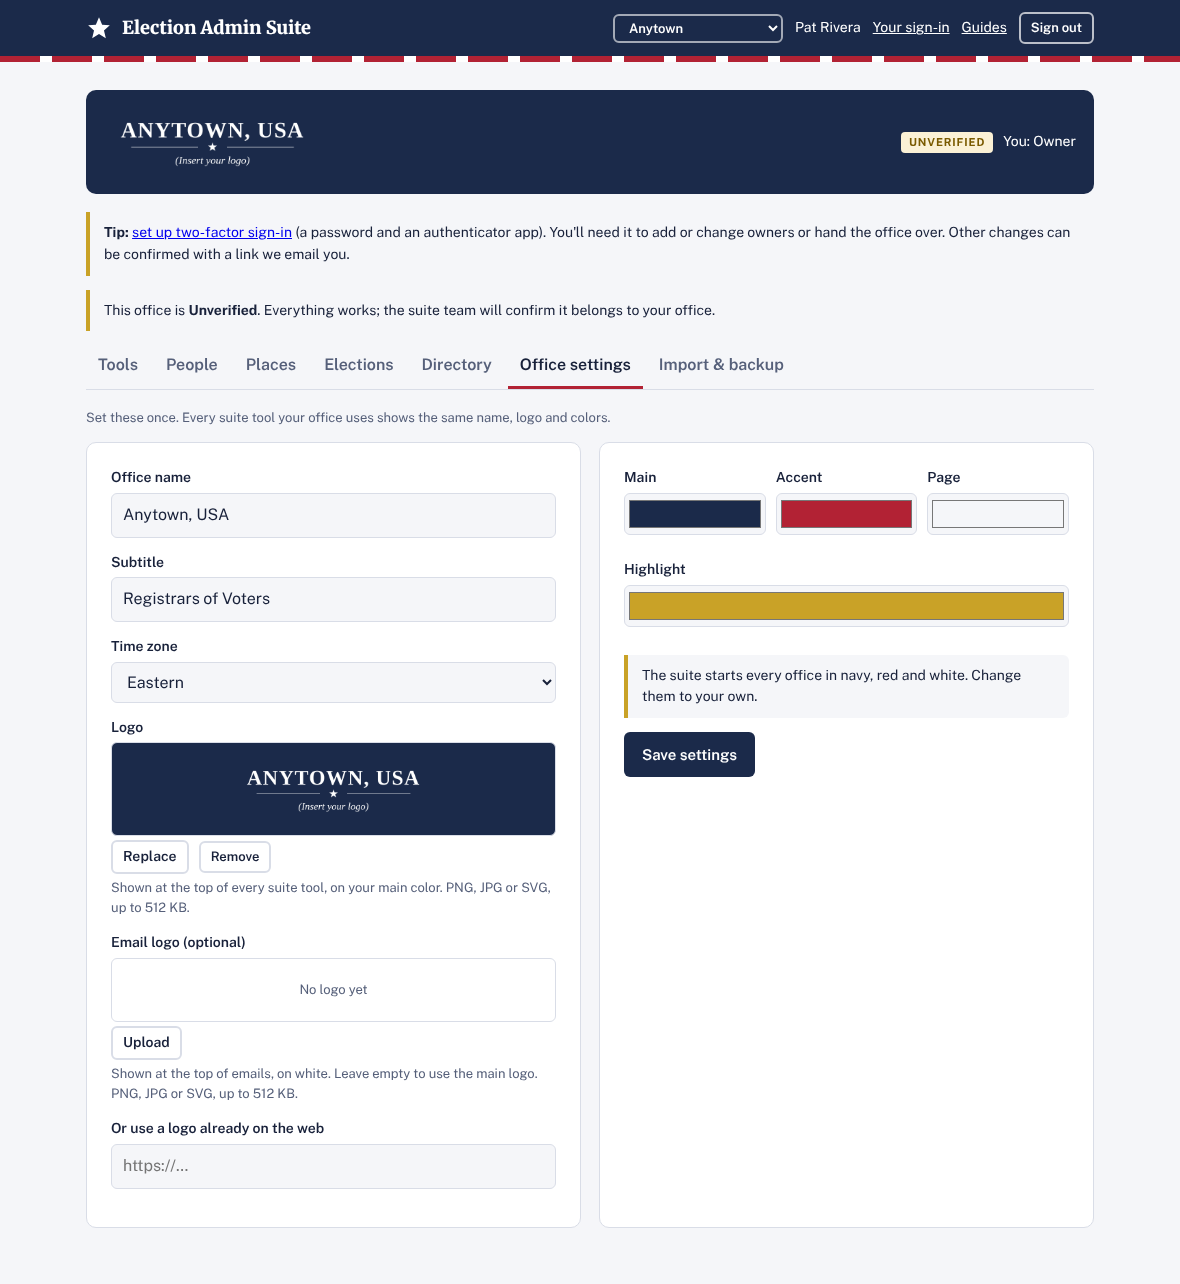
- Click the Office settings tab.
- Office name: how your office appears at the top of every tool, for example Town of Anytown.
- Subtitle: usually your department, for example Registrars of Voters or Town Clerk.
- Time zone: pick yours. Tools use it for polling hours and reminders.
- Logo: click Upload and choose your logo file (PNG, JPG or SVG, up to 512 KB). It shows on your main color, so a light or white logo on a transparent background usually looks best.
- Email logo (optional): a version for emails, which show it on white. Leave it empty to use the main logo.
- Colors: click each color box to pick your Main, Accent, Page and Highlight colors. The suite starts every office in navy, red and white.
- Click Save settings. (The logo saves as soon as you upload it.)
Your logo file is big? The suite shrinks large pictures for you. If yours is still too big, save it smaller (about 1200 pixels wide is plenty) and try again.
5. Add the people in your office
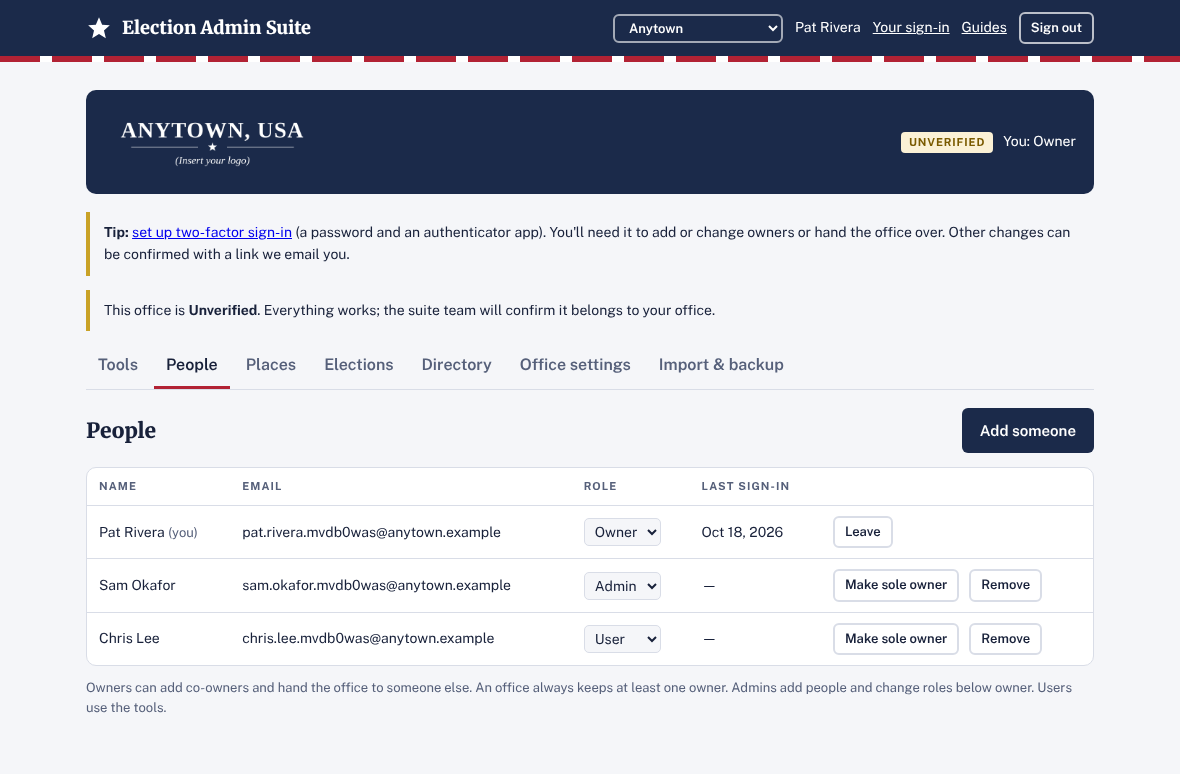
Everyone who uses a suite tool for your office needs to be added here. They sign in with their own email.
| Role | What they can do |
|---|---|
| Owner | Everything, including adding other owners and handing the office to someone else. An office always has at least one owner. |
| Admin | Add people and change roles below owner, change settings and lists, start free demos. |
| User | Use the tools. Can look at settings and lists but not change them. |
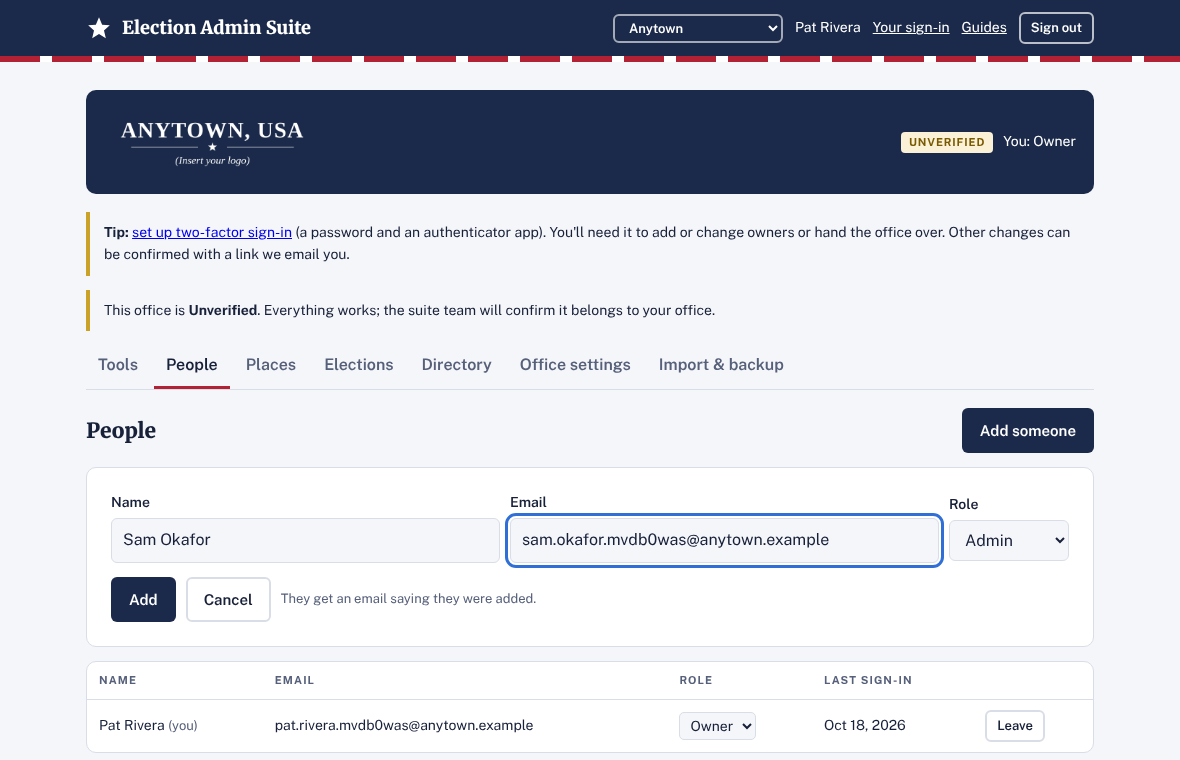
- Click the People tab, then Add someone.
- Type their name and email, and pick their role.
- Click Add. They get an email saying they were added, with a link to sign in.
If someone found your office and clicked Ask to join, they appear at the top under Asked to join. Click Approve as User or Decline.
6. Your places, elections and contacts
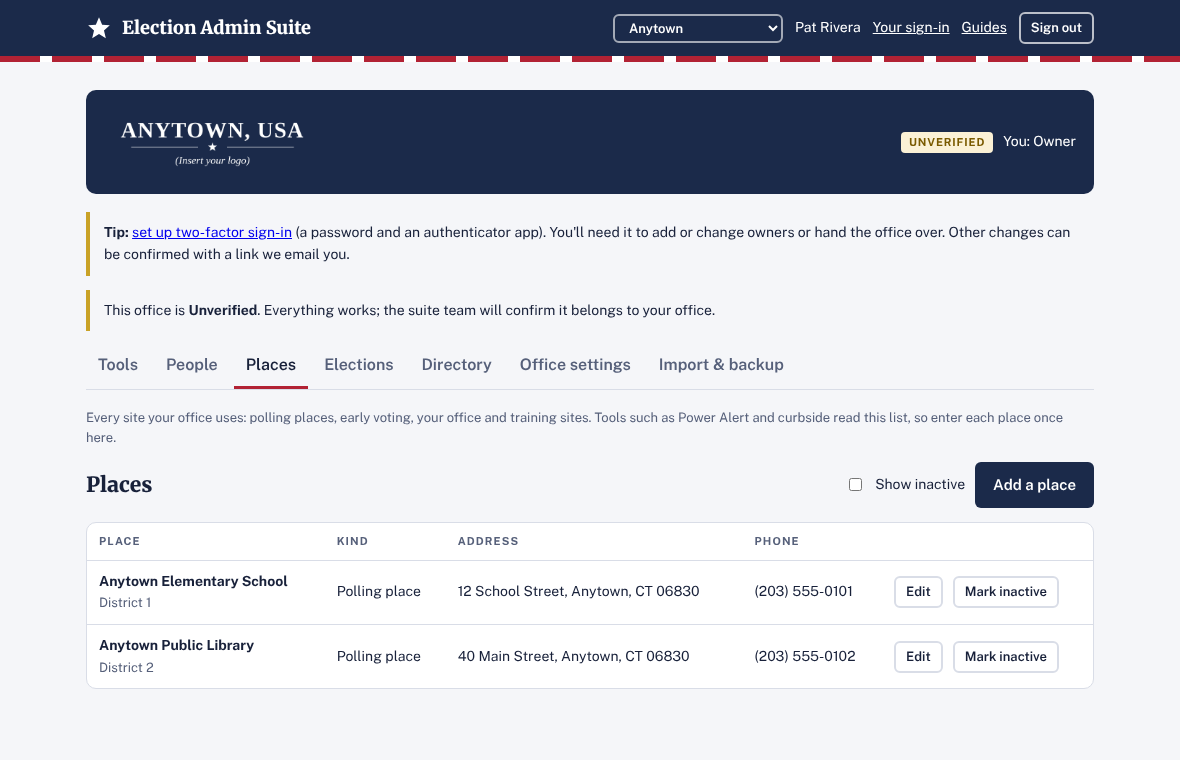
These three lists are shared by every suite tool, so you type each place, election and contact once. Tools show them with an Edit link that brings you back here.
Places
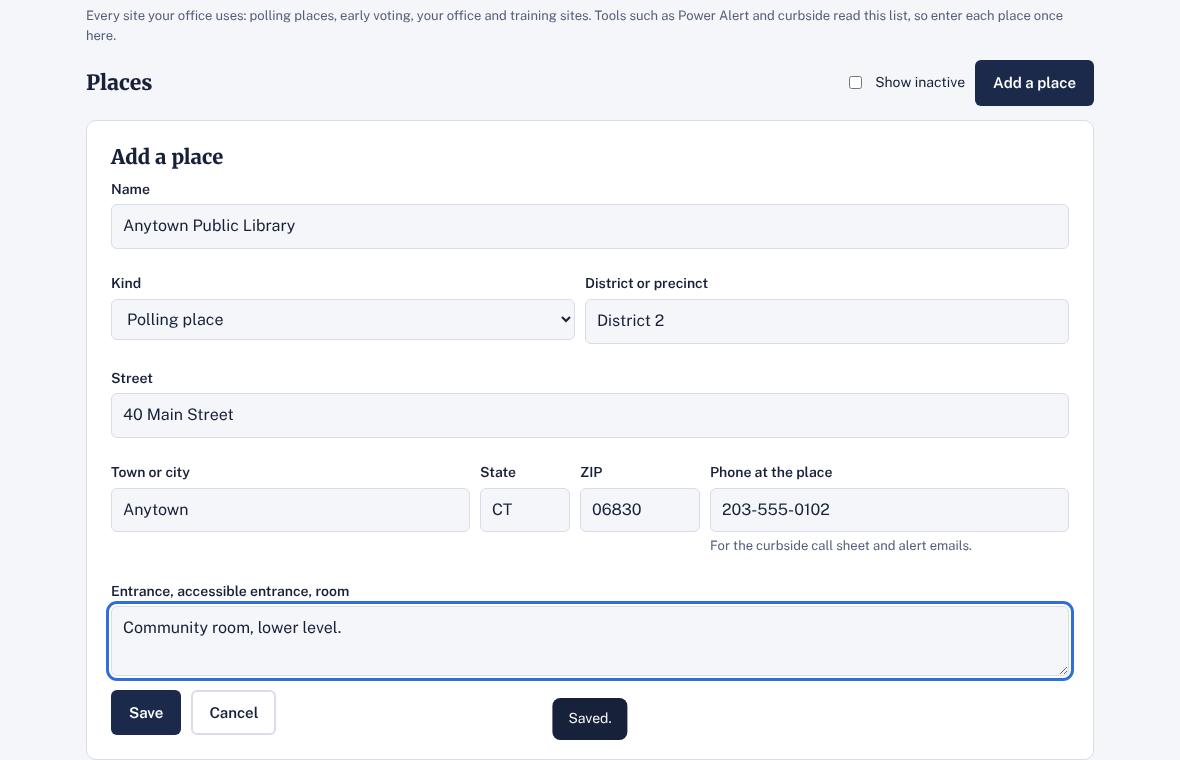
- Click the Places tab, then Add a place.
- Fill in the name, kind (polling place, early voting, office, training site or other), district or precinct, the address, the phone at the place (10 digits) and any notes about the entrance, accessible entrance or room.
- Click Save. Repeat for each place.
Elections
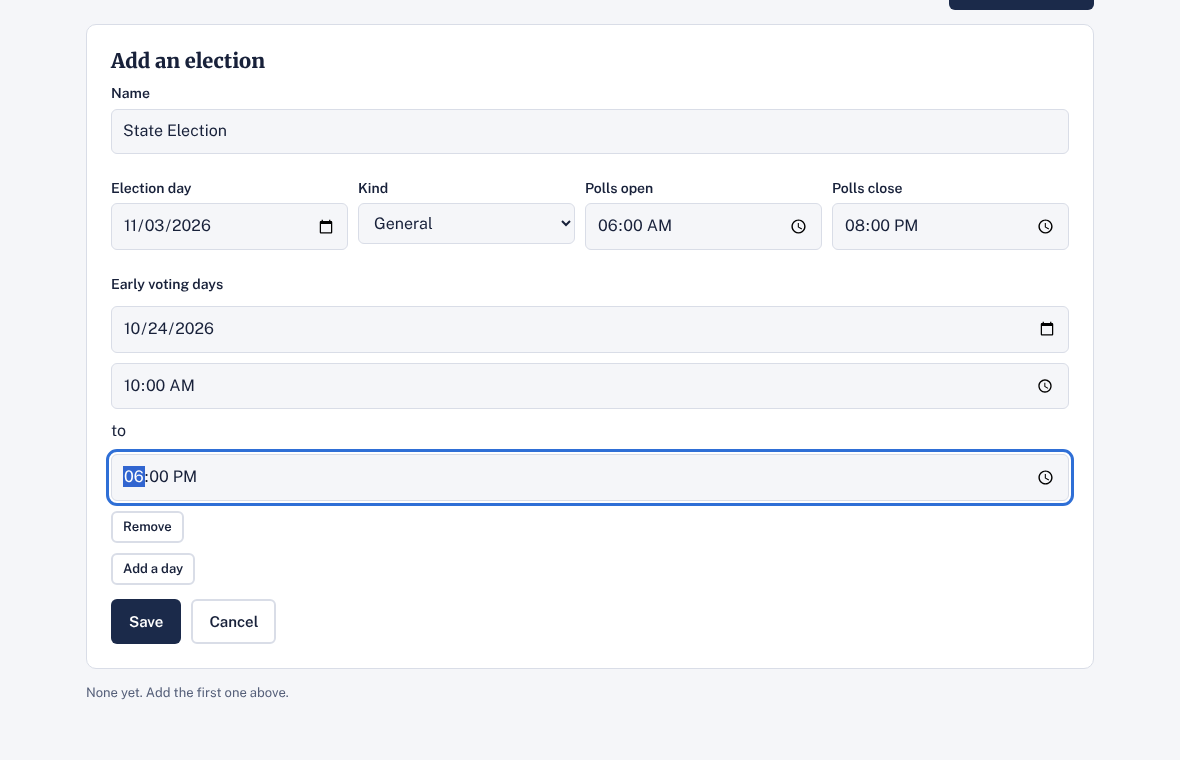
- Click the Elections tab, then Add an election.
- Fill in the name, election day, the kind and the polls open and close times.
- For early voting, click Add a day for each day, with its opening and closing times.
- Click Save.
Directory
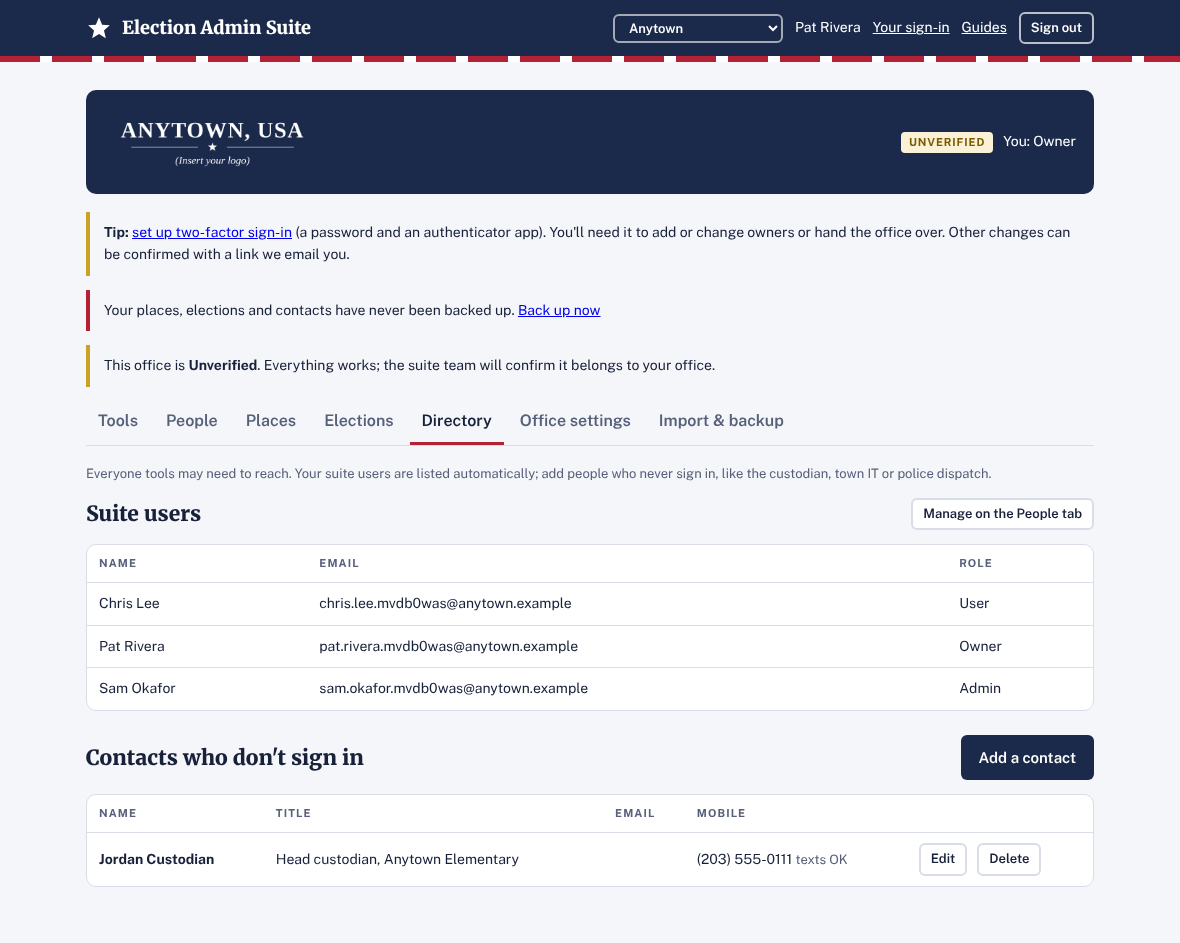
Your suite users appear in the Directory automatically. Add the people tools may need to reach who never sign in: the custodian, town IT, police dispatch.
- Click the Directory tab, then Add a contact.
- Fill in the name, title, and an email or mobile number. Tick They agree to get text messages only if they do.
- Click Save.
7. Bring them in from a spreadsheet
Have your places or contacts in Excel already? Bring them in all at once instead of typing them.
- Click the Import & backup tab.
- Click Blank template (or Download workbook to start from what you've already entered). It opens in Excel or Google Sheets, with a tab each for Places, Elections and Contacts, and an Instructions tab.
- Fill in your rows. Leave the ID column empty on new rows. Keep the ID on rows that came from the suite, so changes update the right one. Rows marked EXAMPLE are samples and are skipped.
- Back on the tab, under Upload, choose your file and click Check the file.
- Read the preview. Each row says Will add, Will change (and what), or Problem, skipped with the reason in plain words, like "Phone numbers need 10 digits".
- Click Save … changes. A backup is taken first, and an Undo this upload button appears in case you change your mind.
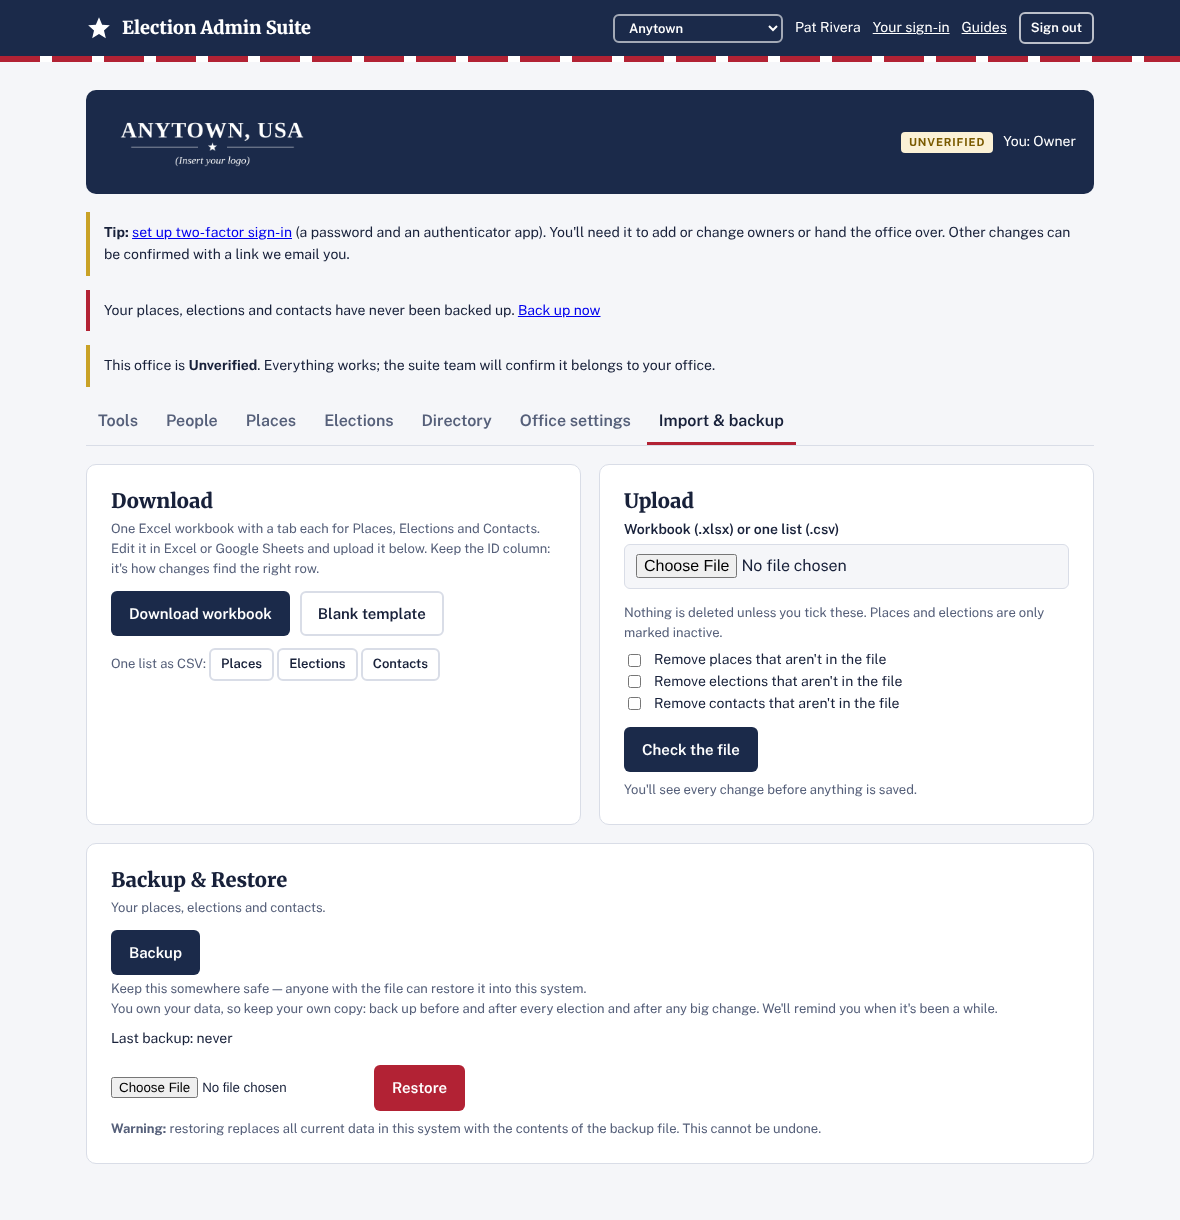
Nothing is ever deleted by an upload unless you tick Remove … that aren't in the file. Even then, places and elections are only marked inactive.
8. Back up
You own your data. Everything your office puts in the suite is yours, and you can take a copy with you any time. Because it's yours, we want you to keep your own copy and back it up regularly: before and after every election, and after any big change.
That's why backing up is built in. One click downloads a backup file, and your places, elections and contacts can also be downloaded as an Excel workbook or CSV files (section 7). Tools that keep your data have their own backup too; each tool's guide says how. And if it's been a while since your last backup, we'll remind you.
What this backup holds: your office's places, elections and contacts, nothing else. It does not hold your people and their roles, your office settings or logo, or anything inside a tool. Each tool that keeps data has its own backup; its guide says how (all guides).
Only owners and admins see the Import & backup tab.
- On the Import & backup tab, under Backup & Restore, click Backup. A file named like suite-lists-backup-anytown-ct-2026-10-13-…-UTC.json downloads.
- Keep it somewhere safe, such as your office's shared drive. Anyone with the file can restore it into the suite.
Once your lists have something in them, owners and admins see how long ago the last backup was at the top of the office's pages: green within a day, yellow up to three days, red after that or if there has never been one. Yellow and red add a Back up now link, which opens the Import & backup tab; you still click Backup there.
Restoring
- Under Backup & Restore, choose the backup file and click Restore.
- The suite reads the file first and asks you to confirm: who took the backup, when, and how many places, elections and contacts it has. Nothing has changed yet.
- Click Replace my lists to go ahead, or Cancel.
Restoring replaces all your places, elections and contacts with the ones in the file. The screen warns that this cannot be undone, and you should treat it that way. There is one safety net: just before a restore (or a spreadsheet upload) the suite saves a copy of your lists as they were. These copies are listed under Automatic backups, the last 20 are kept, and Restore this puts one back. They live only inside the suite, so they're no substitute for the backup files you keep yourself.
9. Open your tools, and try a paid tool free
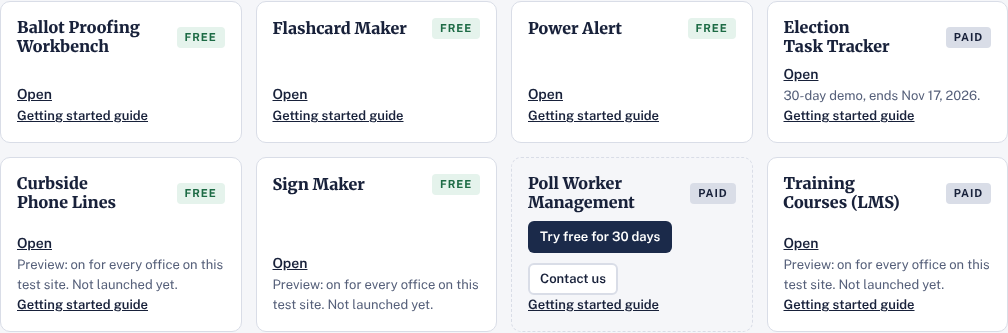
- On the Tools tab (Your suite), click Open on any free tool. Each tool has its own getting-started guide (all guides).
- For a paid tool, an owner or admin can click Try free for 30 days. The demo starts right away; the card shows the day it ends.
- When a demo ends, your data in that tool stays readable and you can still download a backup of it. Click Contact us to extend your trial to keep using it.
10. Two-factor sign-in (recommended for owners)
Two-factor sign-in means a password and a code from an app on your phone. It still protects your office if someone gets into your email. Owners need it to add or change owners or hand the office over; for everyone else it's optional.
- Click Your sign-in at the top of any page.
- Under Password, type a password of at least 12 characters (a short sentence works well) and click Add password.
- Install a free authenticator app on your phone, such as Google Authenticator, Microsoft Authenticator or 1Password.
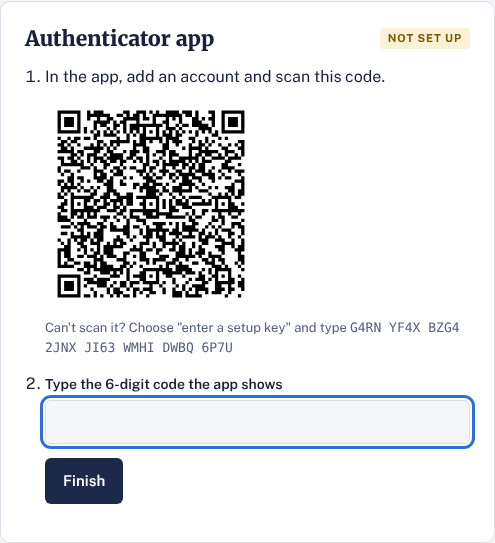
- Under Authenticator app, type your password and click Set up. A square code appears.
- In the app, add an account and scan the square code with your phone's camera.
- Type the 6-digit code the app shows and click Finish.
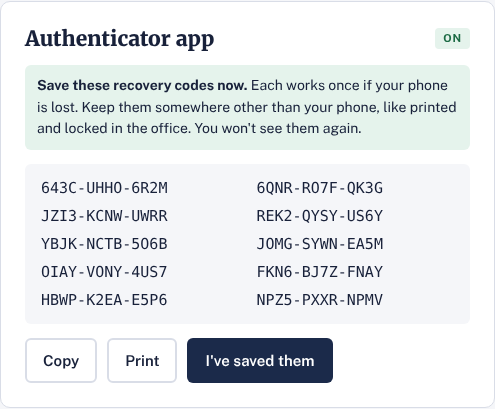
- You now see 10 recovery codes. Each one works once instead of the app's code, if your phone is lost. Click Print or Copy, keep them somewhere other than your phone (printed and locked in the office works), then click I've saved them.
Lost your phone and your recovery codes? Contact the suite team. After checking it's really you, they can reset your password and authenticator so you can set them up again.
11. Signing in from now on
- With an emailed link: go to electionadminsuite.com, click Sign in, type your email and click Email me a sign-in link.
- With your password: click Sign in with a password instead, type your email and password, then the 6-digit code from your app.
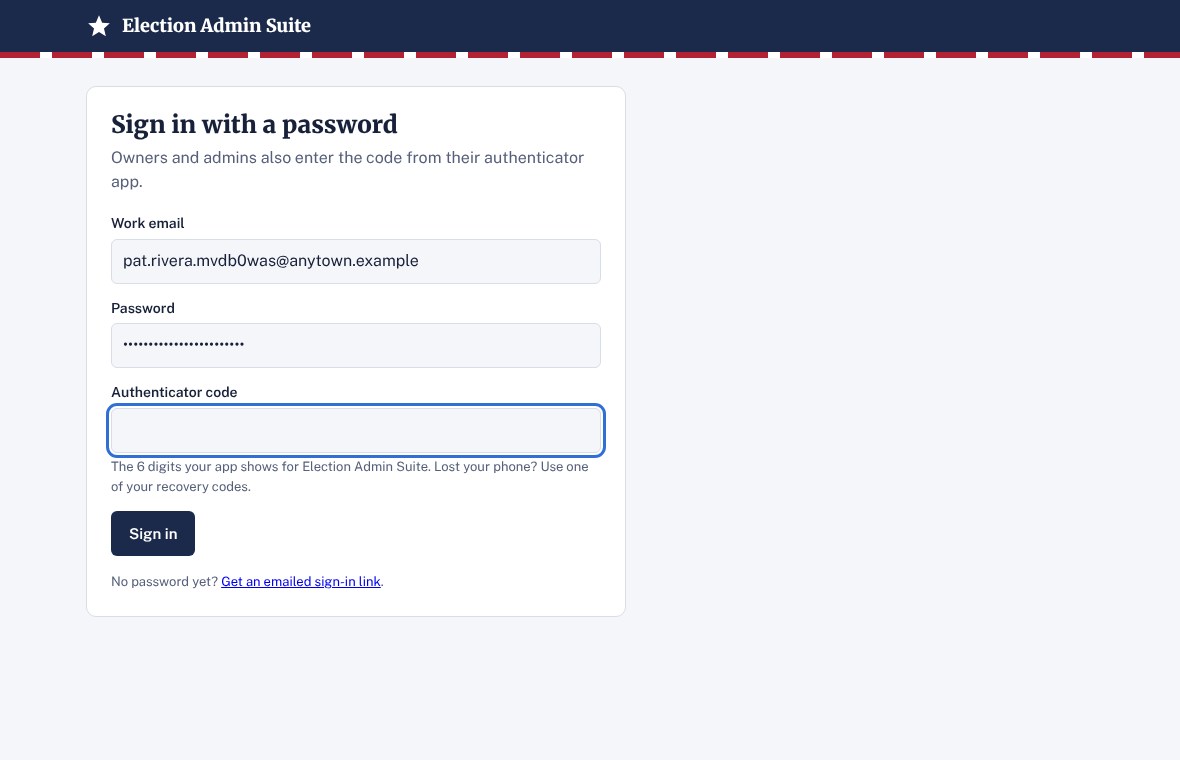
You stay signed in for the working day. Click Sign out at the top when you're done on a shared computer; it signs you out of every suite tool.
12. Look around Anytown first
Not ready to set up your own office? Two ways to try things safely:
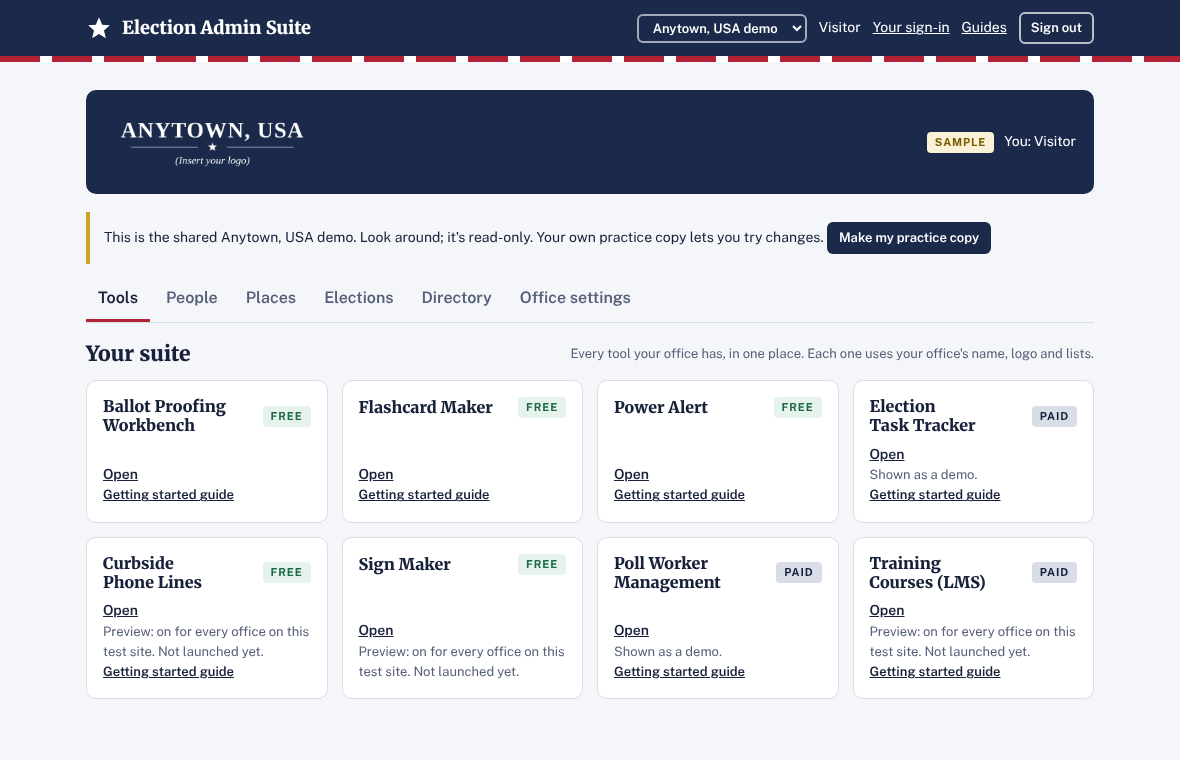
- The shared Anytown demo: pick Anytown, USA demo from the office menu at the top. Anyone signed in can look around. It's read-only.
- Your own practice copy: on the demo, click Make my practice copy (or tick the box when adding your office). It's a sample office of your own to try changes in. It never emails anyone and closes itself after 30 days.
13. Getting help
- Each tool's own guide: all guides.
- Questions, or to extend a trial: the Contact us buttons on your Tools page reach the suite team by email.